General Level 2
Electronics Kit
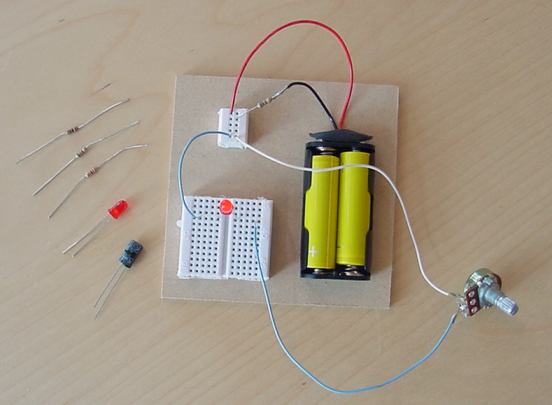
This is how you connect the variable resistor
to control the
brightness of an LED.
Variable resistors are sometimes
called potentiometers.
Like all resistors they are used to
reduce the flow of electrons in a circuit.
Parts:
1 breadboard
1 breadboard power line
AA battery holder
battery connector with 68 OHM resistor
(The 68 OHM resistor reduces current flow)
2 LEDs, (Light Emitting Diode)
(remember that LEDs
have a "+" side and a "-" side)
1000 OHM (brown, black, red, gold)
1500 Ohm (brown, green, red, gold)
3300 Ohm (orange, orange, red)
Variable Resistor (0 to 10000 Ohms)
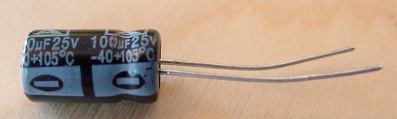
Capacitor (100 uF)
Experimenting with a capacitor.
Capacitors are similar to rechargeable
batteries.
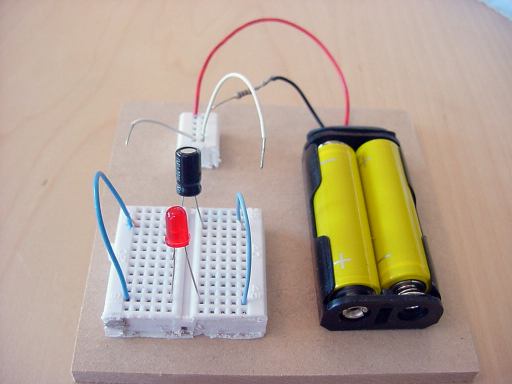
Plug the capacitor into your breadboard and
connect the battery to it.
(Remember that the capacitor has a
"+" and "-" side.
(The minus side is visible in the image
above.)
In less than a second the capacitor will be
charged.
Remove the battery wires from your capacitor
and connect the capacitor to
an LED as shown in the picture below.
Your LED will "blink" once.
Note that the battery is disconnected.
Instead of a wire try using a resistor to
connect your LED
to the capacitor, the LED may glow
longer.
Caution! Only charge your
capacitor with the AA batteries provided.